Archive for the ‘Recipes’

Making Feta Cheese at Home

February 28, 2011
By Holly Jennings

Back in January, when DCCC was deep into Greek cooking, my boyfriend, Mike, who is always challenging me to think outside the box, and to take things one step further, suggested I make homemade feta cheese. Because of my zeal for exhaustive research, I sometimes wonder if he later regrets these, at the time, casually made suggestions. After having made four test batches, the refrigerator is full of multiple containers of feta marked “Test 1,” “Test 2,” and so on. If it weren’t for the fact that feta keeps a very long time in brine—up to a year—I would worry how just the two of us would be able consume so much of it. Now, after allowing all the batches of homemade feta cheese a full four weeks to cure in brine, I’m ready to report my findings to you.
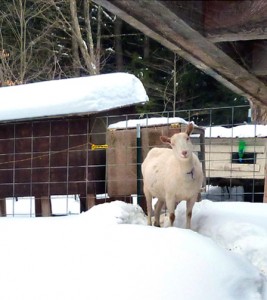
"Creamy," an Alpine-Saanen mix, owned by goat herder Martha Haffner. I love the quizzical look that goat's have.

Living in rural Vermont—a state known for cheese and dairy production—we have fairly easy access to farm fresh goat’s milk, so I made three batches with goat’s milk and one with cow’s milk. Sheep’s milk, the most traditional milk for making feta, is much harder to find where I live.

In addition to using two different milks, I tried two different cultures (sometimes called “starters”)—a basic mesophilic and a feta culture; lipase powder, a water-soluble enzyme added to milk to create stronger flavor in some cheeses; and calcium chloride, used to create a firmer curd.

All of the versions turned out—meaning, they all turned into cheese that looked, tasted, and behaved like feta, though some more than others. Ultimately, the decision of what culture to use, what milk, and whether to use lipase is one of personal taste. I’ll try to objectively describe my own preferences so that you can decide which version you might like to try first.

Like all types of agricultural products, cheesemaking is affected by the seasons. Though there are other variables, the single biggest impact on the flavor of cheese is the feed the animals are on, which is, in turn related to the time of year (dried grains in winter; fresh pasture in summer). According to Mary Jane Toth, author of Goats Produce Too!, lipase is more noticeable in milk during the winter months when goats stock are (more…)

Metaxa Sour

February 15, 2011
By Holly Jennings

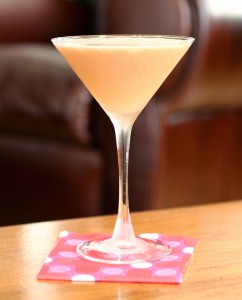
This Greek-inspired cocktail, with delicate citrus flavors and a silky, smooth texture, was created by my friend Miguel Aranda, a professional mixologist and contributor to the book Asian Cocktails. Miguel likes using Greek brandy, known as Metaxa, in cocktails because it has enough heat to hold its own against other cocktail ingredients, yet it is smooth, very smooth. A 7-star Metaxa is actually smoother than many brandies, but then, it’s not a true brandy. It can be more correctly thought of as a brandy liqueur because it is sweetened with Muscat wine and flavored with botanicals. It is aged in limousine oak barrels for typically three, five, or seven years, though sometimes longer. The stars on the bottle signify the number of years the brandy has been aged, and the greater number of stars, the smoother the Metaxa will be.
I made this cocktail last week for Georgia and Judy at DCCC’s Greek-themed potluck. I’ve stirred and shaken lots of cocktails, but, before making a Metaxa Sour, had never flamed an orange peel. It definitely adds a new level to cocktail showmanship, especially in the setting of a dimly lit room.

For instructions on how to flame an orange peel, given by a calm, cool, and collected professional, you can watch this clip recommended by Miguel, or you can watch me fumble through it in my kitchen video, below. (My Internet connection is maddeningly slow—a problem of rural living—so in the video, Georgia reads instructions for flaming an orange peel from the book The Craft of the Cocktail by Dale Degroff.) I suggest watching the first video of me making the cocktail for guidance, and then watch the “Ins and Outtakes of Making a Metaxa Sour” to give yourself some cocktail shaking and flaming confidence, knowing that if you don’t get it right the first time, you can try again, and again (like I did).

The orange peel adds more than visual effect. It adds a subtle touch of flavor and aroma. If you don’t like playing with matches, then twist the peel, rind-side-down, over the cocktail and rub it on the rim before placing it in the drink. (I forgot to rub the rim of the cocktail glass with the orange peel in the video, but should have done. I also forgot to add the orange peel garnish to the cocktail when photographing it! Please don’t do as I did.)

Metaxa Sour

Makes one 4½-ounce cocktail

2 ounces 7-star Metaxa
¾ ounce fresh squeezed orange juice
¼ ounce fresh squeezed lemon juice (see note)
¼ ounce 2:1 simple syrup (2 parts sugar heated in 1 part water until melted)
1 egg white
Dash of orange bitters
Flamed orange peel, for flavor and garnish

In an iced shaker, add the Metaxa, orange juice, lemon juice, simple syrup, egg white, and bitters. Shake vigorously for 15 seconds. Strain into a chilled cocktail glass. Garnish with the flamed orange peel.

Note: In Miguel’s version of this recipe, he uses ½ ounce of “sweet and sour mix,” which is comprised of equal parts fresh squeezed lemon juice and 2:1 simple syrup. For simplicity, I state this ingredient in the recipe as ¼ ounce lemon juice and ¼ ounce simple syrup. If you are entertaining, and making several Metaxa Sours, making a batch of sweet and sour mix will be more efficient. Simply replace the lemon juice and simple syrup with ½ ounce of sweet and sour mix. Note that in the video, the batch of sweet and sour mix I’ve made has a light tan color. This is because I used unrefined cane sugar, which is okay when making a cocktail with a dark-colored base liquor. If making cocktails with a clear liquor—vodka or gin, for example—you will want to make simple syrup with white, granulated sugar.


Greek Drinking Chocolate

February 05, 2011
By Holly Jennings

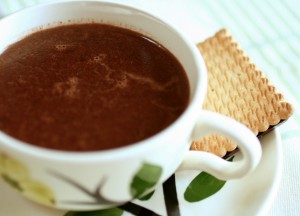
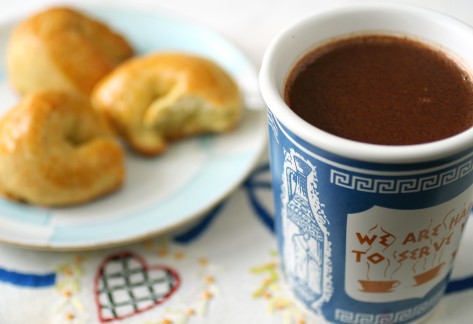
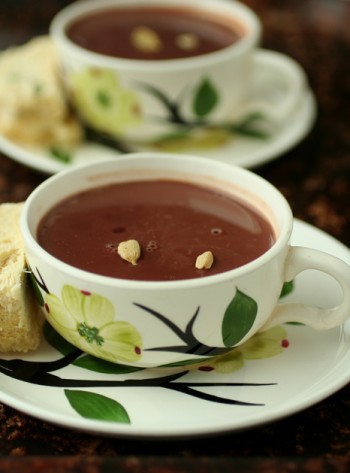
Greeks love honey, and are famous for the variety and quality their bees produce, chief among being wild thyme honey. I’m intrigued with honeys that capture the flavor of specific regional herbs, flowers or trees, and, though I’ve never tried thyme honey, I like to imagine how it might taste. With this special Greek honey in mind, this drinking chocolate is sweetened with honey and infused with the flavor of fresh thyme and orange zest—the latter, a common ingredient in Greek pastries, cakes, biscuits, and breads. While I’m not sure how Greek this drinking chocolate tastes, it does taste good. I enjoyed it with Olive Oil Biscuits with Cumin and Sesame, a common breakfast food in Greece, from the DCCC pick The Food and Wine of Greece.* (For lots more information on the basics of making and serving drinking chocolate, read My Favorite Drinking Chocolate.)
Makes four 6-ounce servings

4 cups whole milk
1 heaping tablespoon grated orange zest (from about 1large orange)
4 to 6 sprigs fresh thyme
4 tablespoons Dutch-processed (alkalinized) cocoa powder
2 ounces bittersweet chocolate (52 to 55% cacao), chopped (see note)
2 tablespoons honey
Small pinch of sea salt

  1. Combine the milk, orange zest and thyme in a small, heavy saucepan. Bring to a gentle boil over medium heat, stirring frequently. (If your saucepan has a thin bottom, heat the milk over medium-low heat.) Immediately reduce the heat to low and simmer for 25 minutes, stirring occasionally. (If you think you may have scorched the milk, do not scrape the bottom of the pan when stirring.) Strain the milk and discard the zest and thyme. The milk will have reduced by about 1 cup.
  2. Place the cocoa powder in a small, heavy saucepan. While stirring vigorously, over medium-low heat, gradually add ¼ cup of the heated milk, a tablespoon at a time. Continue stirring until all lumps of cocoa are incorporated and the mixture is smooth.
  3. Add the chocolate and reduce the heat to low. Gradually add another ¼ cup of the milk, while stirring. Heat until the chocolate is melted, stirring often. Add the remaining milk in a steady stream, while stirring. Bring to the gentlest simmer. Add the honey and salt. Stir until the honey is dissolved and serve.

 Note: Better quality chocolate with higher amounts of cacao solids tends to be available in block form, necessitating chopping. To make sure the chocolate melts at an even rate, chop the block into small, similar-size pieces. I like chopping chocolate; however, if you can find what you want in pistoles or chips, this will eliminate a step.

*Though the English recipe title for these delicious biscuits in The Food and Wine of Greece is “Olive Oil Biscuits with Cumin and Sesame,” no sesame seeds are included in the recipe. Finding this confusing, I wrote to Diane Kochilas, the author of The Food and Wine of Greece, about the use of sesame seeds. She said they are optional, and if used, would be sprinkled on the outside of the biscuit after the egg wash is applied.


Spinach and Rice Pilaf with Shrimp and Feta

January 26, 2011
By Holly Jennings

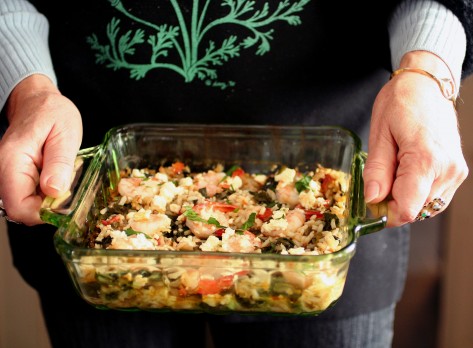
This is Georgia Cone’s family recipe for Spanakorizo, but with a twist. In this version, the classic spinach and rice pilaf is topped with cooked shrimp and feta cheese and baked until bubbling, to make a nourishing and very flavorful one-pot rice dish.
Georgia’s family likes to use converted rice for pilafs; she says that it holds up better after longer cooking times. For many years I’d thought converted rice was some sort of instant rice. Far from it. Converted rice has been parboiled and then toasted, which, despite it being partially precooked, makes it very hard—making it take longer to cook than regular rice, and hold its shape. (more…)


Spinach and Rice Pilaf with Chicken

January 26, 2011
By Holly Jennings

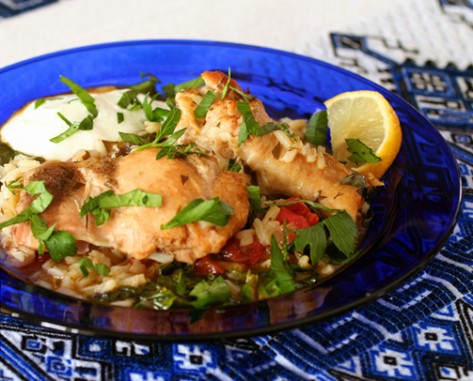
This is Georgia Cone’s family recipe for Spanakorizo me Kotopoulo, a hearty one-pot chicken-and-rice dish evolved from the simpler, vegetarian Spanakorizo, or Spinach and Rice Pilaf. To make this version, you begin by browning chicken pieces and then proceed with the recipe as if making Spinach and Rice Pilaf, swapping the water or vegetable broth out for chicken broth for a richer pilaf.
Georgia’s family likes to use converted rice for pilafs; she says that it holds up better after longer cooking times. For many years I’d thought converted rice was some sort of instant rice. Far from it. Converted rice has been parboiled and then toasted, which, despite it being partially precooked, makes it very hard—making it take longer to cook than regular rice, and hold its shape. (more…)


Greek Pilafs—Satisfying One-Pot Meals

January 26, 2011
By Holly Jennings


Georgia Cone—a Greek-American, born Georgia Sardonis—is a member of Dowdy Corners Cookbook Club, and a fabulous cook.  I spent the morning with her a few weeks ago cooking rice pilafs and learning a bit about Greek cooking and her family history. (more…)


Masala Drinking Chocolate

January 13, 2011
By Holly Jennings

This drinking chocolate is inspired by the flavor and aroma of the famous Indian tea known as chai. There are various recipes for chai. The simplest style, like the recipe in the previous DCCC pick Entice with Spice, is made with black tea, milk, sugar and cardamom pods; more complex chai, using several spices, are called Masala Chai. (Masala means “spice” in Hindi.) Some masala chai have a licorice accent via fennel or anise seed—thus the addition here of Pernod, a licorice-flavored liqueur. (My bar is directly above my spice drawer, so it’s easy to get side-tracked.) (more…)


My Favorite Drinking Chocolate

January 07, 2011
By Holly Jennings

I’m passionate about drinking chocolate, so much so that I finagled a way to work it into the theme of Dowdy Corners Cookbook Club. For each DCCC cookbook pick, I will challenge myself to come up with a new drinking chocolate recipe inspired by the subject of the book. The first step, before spinning off into exotic riffs, is to give you my recipe for basic drinking chocolate, and an overview of my approach to making the drink, which can be modified to your taste.
I’ll try to brief, but I have a lot to say about drinking chocolate. It’s been my most constant source of pleasure in the kitchen for the last several years: I love the process of making it, experimenting with different sweeteners and flavorings, and drinking it, especially with my boyfriend, Mike. (If our relationship has a food theme, it’s drinking chocolate.)

(more…)


Plain Boiled Rice

December 20, 2010
By Holly Jennings

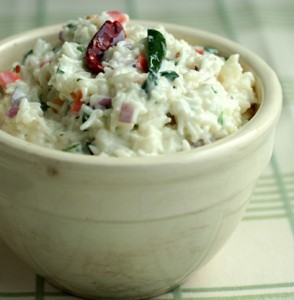
Yogurt Rice, one of several flavored rice recipes in ENTICE WITH SPICE that uses Plain Boiled Rice

I’ve made the recipe for Plain Boiled Rice from Entice with Spice several times, and am very happy with the results: I’ve gotten perfectly cooked Basmati rice every time with fluffy, individual grains. I’ve doubled the amount and have had equally good results.

Plain Boiled Rice (Chawval) goes with several dishes in Entice with Spice, especially the curries or any dish with a bit of a sauce, such as Chicken Tikka Masala. It is also used to make several flavored rice dishes in the book, such as the one shown above.

Serves 4 as a side dish 

Prep time: 5 minutes + 30 minutes soaking
Cook time: 15 minutes + 5 minutes to rest
Refrigerator life: 3 days Freezer life: 1 month
Reheating method: Place the refrigerated or defrosted rice in a microwave, sprinkle a few drops of water on it and stir periodically. Or, place the rice in a saucepan, sprinkle a few drops of water on it and warm over medium-low heat, stirring periodically. 

 1 cup (180 g) uncooked white Basmati rice (or plain long-grained white rice) 
 1½ cups (375 ml) water 

  1.  Place the rice in a small bowl and cover with cold water. Let the rice soak for 30 minutes at room temperature.
  2. Carefully pour the soaking water out of the bowl. Rinse the rice three or four times by repeatedly filling the bowl with cold water and carefully draining off the water. It is okay if the water is not completely clear, but try to get it as clear as you can. Pour the rice into a sieve to drain.
  3. Place the drained rice and water in a medium saucepan. Bring to a rolling boil over high heat. It is okay if the water gets frothy.
  4. Stir and reduce the heat to low. Cover the saucepan. Simmer undisturbed until the water is completely absorbed and you do not see any more water on the bottom of the saucepan if you insert a spoon through the rice, about 8 minutes. You might see dimples formed on the surface of the rice, which is a sign that the water is completely absorbed.
  5. Turn off the heat. Let rest, covered, for 5 minutes on the warm stove. Keep covered until ready to serve or let cool to room temperature and refrigerate or freeze for later. Before serving, gently fluff the rice with a fork.

TROUBLESHOOTING TIPS: 

  •  Making perfect rice can be tricky at first, as common problems are that the rice turns out mushy or it burns and sticks at the bottom of the pan. A good way to avoid burnt rice is to use a heavy bottomed saucepan.
  • If your rice tends to be mushy: after reducing the heat to low in Step 4, make sure the rice is simmering. If it’s just sitting in hot water, it will take a long time to cook, and it will become mushy and sticky. Increase the heat if needed so the rice is simmering. If your rice is still mushy, you may have overcooked it. As soon as you do not see any more water on the bottom of the saucepan if you insert a spoon through the rice, turn off the heat.
  • If you are new to making rice, for best results for all rice dishes in this chapter, I would first try making the amount in the recipe instead of doubling it. Once you get comfortable with making rice, then you can double the recipe. It is best to gently fluff the rice with a fork after it has cooled a bit so the rice grains do not break apart.

(Recipe ingredients and instructions reprinted with the express permission of Tuttle Publishing, www.tuttlepublishing.com. Recipe introduction was written by Holly Jennings.)


Chicken Tikka Masala

December 20, 2010
By Holly Jennings

 (Adapted)

I made this recipe for Chicken Tikka Masala from Entice with Spice for the first DCCC potluck, where it was a big hit. This rich and creamy dish with an elegant balance of Indian spices is great for special occasions or when you feel like treating yourself to something indulgent. This recipe involves a two-step process, making it one of the few recipes in Entice with Spice that takes longer than 30 or 35 minutes to make. The first step is to make Chicken Kebabs (Murgh Tikka), which, in Entice with Spice, is presented as a separate recipe in the appetizer chapter. The second step is to make the Chicken Tikka Masala, which involves making a masala, pureeing it, and then adding cream and the cooked chicken to it.

Here I’ve combined the two steps and have adapted the recipe to serve six to eight people. I suggest making this amount because even if you’re serving fewer people, you will wish you had leftovers the next day. And as long as you’re going to the trouble to make it, in this case, more is better. 

(more…)


css.php